


Hey there, fellow Ford owners and car enthusiasts! I'm stoked to share my knowledge about mounting a Ford OEM backup camera. As a supplier of Ford OEM backup cameras, I've seen firsthand how these cameras can transform your driving experience, making it safer and more convenient. So, let's dive right in and learn how to mount one of these bad boys on your Ford.
Why Choose a Ford OEM Backup Camera?
Before we get into the mounting process, let's talk about why you should choose a Ford OEM backup camera in the first place. OEM, or Original Equipment Manufacturer, means that these cameras are made by the same company that built your Ford. This ensures a perfect fit and seamless integration with your vehicle's existing systems. You won't have to worry about compatibility issues or a shoddy installation.
Another great thing about Ford OEM backup cameras is their quality. They're built to last, with high-resolution lenses and durable construction that can withstand the elements. Plus, they come with all the features you need, like night vision, wide-angle views, and guidelines to help you park and reverse with ease.
Tools You'll Need
Now that you're convinced that a Ford OEM backup camera is the way to go, let's talk about the tools you'll need for the installation. Here's a list of the essentials:
- Screwdriver set: You'll need a variety of screwdrivers to remove and install the necessary panels and components.
- Trim removal tools: These tools will help you remove the interior trim without damaging it.
- Wire strippers and crimpers: You'll use these to connect the camera's wires to your vehicle's electrical system.
- Drill and drill bits: If you need to make any holes for the camera or wiring, you'll need a drill and the appropriate drill bits.
- Electrical tape: This will help you secure the wires and prevent them from shorting out.
- Zip ties: You'll use these to organize and secure the wiring.
Step-by-Step Installation Guide
Okay, now that you have all the tools you need, it's time to start the installation process. Here's a step-by-step guide to help you mount your Ford OEM backup camera:
Step 1: Choose the Right Camera
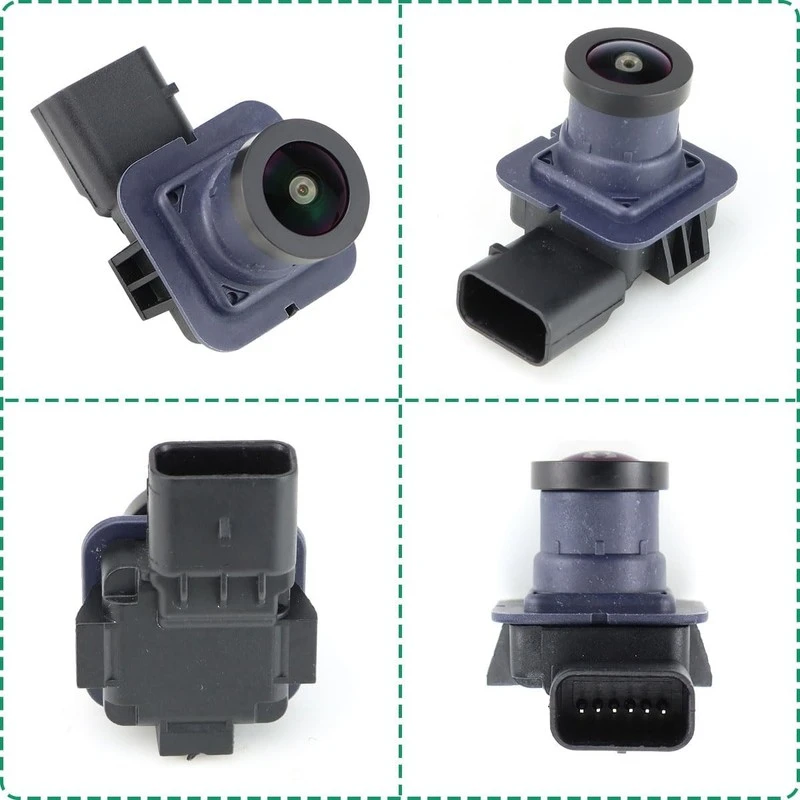
The first step is to choose the right camera for your Ford. There are different models available for different Ford vehicles, so make sure you select the one that's compatible with your make and model. You can find the right camera for your Ford by checking the part number or by consulting your vehicle's owner's manual.
Here are some popular Ford OEM backup cameras that you might be interested in:
- Ford Edge (Part No. BT4Z19G490) 2013 - 2015 OEM Backup Camera
- Ford Taurus (Part No. EG1Z19G490) 2013 - 2019 OEM Backup Camera
- Ford Raptor F15 (Part No. BL3Z19G490) 2011 - 2014 OEM Backup Camera
Step 2: Prepare Your Vehicle
Before you start the installation, you'll need to prepare your vehicle. This involves removing the necessary panels and components to access the area where you'll be mounting the camera. Use your trim removal tools to carefully remove the interior trim around the rear of your vehicle. Be gentle to avoid damaging the trim.
Step 3: Mount the Camera
Once you've removed the necessary panels, it's time to mount the camera. The location of the camera will depend on your vehicle's make and model, but it's usually mounted near the license plate or on the rear bumper. Use the drill and drill bits to make any necessary holes for the camera or wiring. Then, use the screws provided with the camera to secure it in place.
Step 4: Connect the Wires
Now that the camera is mounted, it's time to connect the wires. The camera will come with a wiring harness that you'll need to connect to your vehicle's electrical system. Use your wire strippers and crimpers to connect the wires, making sure to match the colors correctly. Then, use electrical tape to secure the connections and prevent them from shorting out.
Step 5: Route the Wiring
Once the wires are connected, you'll need to route them through your vehicle to the appropriate location. Use zip ties to organize and secure the wiring, making sure it's out of the way and won't interfere with any moving parts. You may need to remove additional panels or components to access the wiring harness.
Step 6: Test the Camera
Before you put everything back together, it's important to test the camera to make sure it's working properly. Start your vehicle and put it in reverse. The camera should automatically turn on and display a clear image on your vehicle's display screen. If the camera isn't working, double-check your connections and make sure the wiring is properly routed.
Step 7: Reassemble Your Vehicle
Once you've tested the camera and everything is working properly, it's time to reassemble your vehicle. Use your screwdriver set and trim removal tools to put the panels and components back in place. Make sure everything is securely fastened and there are no loose parts.
Tips and Tricks
Here are some tips and tricks to help you make the installation process go smoothly:

- Read the instructions: Before you start the installation, make sure you read the instructions that come with your camera carefully. This will help you understand the process and avoid making any mistakes.
- Take your time: Installing a backup camera can be a time-consuming process, especially if you're not familiar with your vehicle's electrical system. Take your time and don't rush through the installation.
- Label the wires: To make it easier to connect the wires, label them with masking tape or a marker. This will help you keep track of which wire goes where.
- Get help if you need it: If you're not comfortable working on your vehicle's electrical system, or if you're having trouble with the installation, don't hesitate to get help from a professional.
Contact Us for More Information
If you have any questions about mounting a Ford OEM backup camera or if you're interested in purchasing one, please don't hesitate to contact us. We're a leading supplier of Ford OEM backup cameras, and we're here to help you find the right camera for your vehicle and provide you with all the support you need for a successful installation.
References
- Ford Owner's Manual
- Ford OEM Backup Camera Installation Instructions


