


Installing a Volkswagen reversing camera decoding module in a new - generation Volkswagen model can significantly enhance your driving safety and convenience. As a trusted supplier of Volkswagen reversing camera decoding modules, I'm here to guide you through the installation process step - by - step.

Why Install a Reversing Camera Decoding Module?
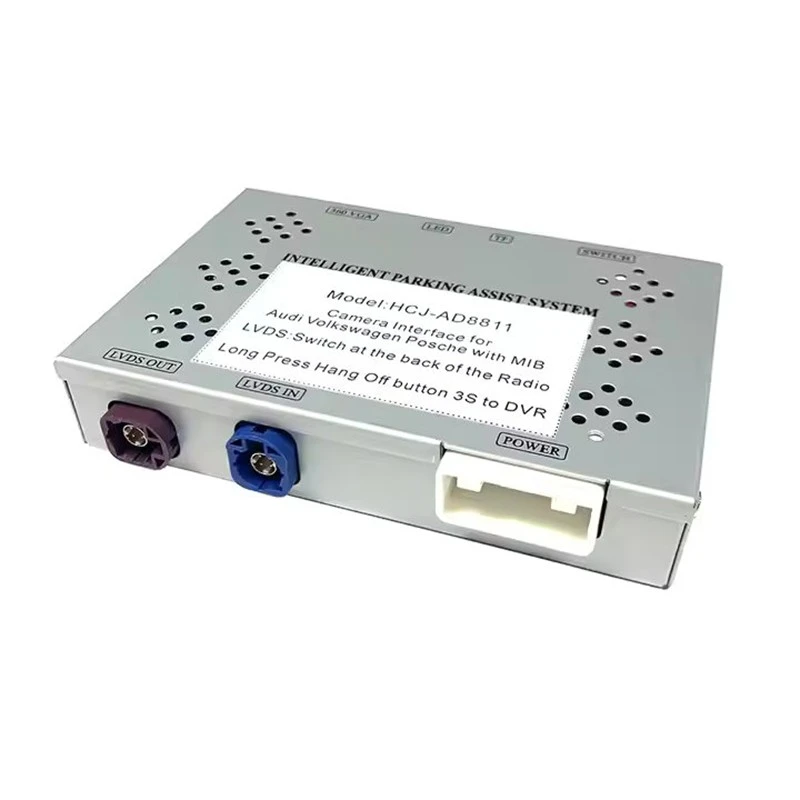
Before we dive into the installation process, let's understand why a reversing camera decoding module is essential. New - generation Volkswagen models often come with advanced infotainment systems. A reversing camera decoding module allows the camera to communicate seamlessly with these systems, displaying clear and accurate images on the in - car screen when you shift into reverse. This not only helps you avoid obstacles while reversing but also adds a touch of modern functionality to your vehicle.
Prerequisites
- Tools: You'll need a set of basic tools, including a screwdriver set (both flat - head and Phillips), wire cutters, wire strippers, and electrical tape.
- Decoding Module: We offer two popular models. The Volkswagen Co - Driver CD Reverse Camera Decoder Module (2016 - 2023 Full Compatibility) is suitable for a wide range of Volkswagen models from 2016 to 2023. If you have a new - energy Volkswagen or Audi model from 2021 - 2024, the Volkswagen/Audi New Energy Reverse Camera Decoder Module (2021 - 2024 Full Compatibility) is the perfect choice.
- Reversing Camera: Make sure you have a high - quality reversing camera that is compatible with your Volkswagen model.
Installation Steps
Step 1: Prepare the Vehicle
Park your Volkswagen in a safe and well - lit area. Engage the parking brake and turn off the engine. Open the trunk or rear hatch to access the area where the reversing camera will be installed.
Step 2: Mount the Reversing Camera
- Select the Location: Choose a suitable location for the reversing camera. It should be mounted at a height and angle that provides a clear view of the area behind the vehicle. Common locations include near the license plate or on the rear bumper.
- Drill Holes (if necessary): If the camera requires drilling for installation, mark the holes carefully and use a drill bit of the appropriate size. Be cautious not to damage any wiring or other components in the area.
- Attach the Camera: Secure the camera in place using the provided screws or mounting brackets. Connect the camera cable to the camera.
Step 3: Route the Camera Cable
- Trunk or Hatch Area: Start by routing the camera cable through the trunk or hatch. You can use existing cable channels or create new ones using cable clips. Make sure the cable is not pinched or damaged.
- Interior of the Vehicle: Carefully route the cable from the trunk into the interior of the vehicle. This may involve removing some interior trim panels. Use a trim removal tool to avoid damaging the panels.
- Dashboard Area: Route the cable towards the dashboard area where the decoding module will be installed.
Step 4: Install the Decoding Module
- Locate a Suitable Mounting Location: The decoding module should be mounted in a dry and secure location. A common location is under the dashboard or near the infotainment system.
- Connect the Wires: Refer to the wiring diagram provided with the decoding module. Connect the camera cable to the appropriate input on the decoding module. Also, connect the power wires to the vehicle's electrical system. Make sure to connect the positive and negative wires correctly to avoid electrical issues.
- Connect to the Infotainment System: Use the provided adapter cable to connect the decoding module to the vehicle's infotainment system. This may involve plugging into a specific port on the back of the infotainment unit.
Step 5: Test the System
- Turn on the Ignition: Turn on the ignition without starting the engine. Shift the vehicle into reverse. The infotainment screen should display the image from the reversing camera.
- Adjust the Camera Angle: If the image is not properly aligned, make small adjustments to the camera angle until you get a clear and useful view.
Step 6: Reassemble the Vehicle
- Replace Interior Trim Panels: Once you are satisfied with the camera's performance, reassemble any interior trim panels that were removed during the installation process.
- Close the Trunk or Hatch: Close the trunk or rear hatch securely.
Troubleshooting
- No Image on the Screen: Check all the connections to ensure they are secure. Make sure the power is properly connected to the decoding module and the camera.
- Blurry or Distorted Image: This could be due to a loose camera connection or a problem with the camera itself. Check the camera cable and, if necessary, clean the camera lens.
- Interference or Noise: If there is interference or noise on the image, check for nearby electrical sources that may be causing the problem. You can try using shielded cables or moving the decoding module to a different location.
Conclusion
Installing a Volkswagen reversing camera decoding module in a new - generation Volkswagen model is a rewarding project that can enhance your driving experience. With the right tools, the appropriate decoding module, and a bit of patience, you can complete the installation yourself. If you have any questions or need further assistance during the installation process, don't hesitate to reach out to us.
As a supplier of high - quality Volkswagen reversing camera decoding modules, we are committed to providing you with the best products and support. Whether you are a DIY enthusiast or a professional installer, we have the right solution for your needs. If you are interested in purchasing our decoding modules or have any inquiries about our products, please contact us for procurement and further discussions. We look forward to serving you and helping you make your Volkswagen safer and more convenient.
References
- Volkswagen vehicle owner's manual
- Installation guides provided with the reversing camera decoding modules.


