


Hey there! As a supplier of dynamic trajectory reverse cameras, I'm stoked to share with you all the ins and outs of their installation requirements. Whether you're a car enthusiast looking to upgrade your ride or a professional installer, this blog is gonna give you the lowdown on what it takes to get these nifty cameras up and running.
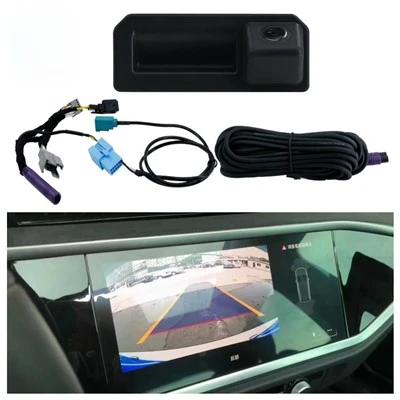
First off, let's talk about what a dynamic trajectory reverse camera actually is. It's not just your average backup camera. These bad boys use advanced technology to display a dynamic guide line on your screen, which adjusts according to the steering angle of your vehicle. This means you can see exactly where your car is gonna go when you're reversing, making parking and maneuvering in tight spaces a whole lot easier.
Now, onto the installation requirements. The first thing you need to consider is the compatibility of the camera with your vehicle. Not all dynamic trajectory reverse cameras are created equal, and they need to be specifically designed to work with your car's make and model. For example, if you've got an Audi Q3, Q5, or A5 with an MIB3 system, you'll want to check out our Audi Q3/Q5/A5 Exclusive MIB3 Flush-Mount Reverse Camera. It's designed to fit perfectly into your car's existing system and provide a seamless installation.
Similarly, if you drive a Volkswagen with an MIB system, our Volkswagen MIB Dynamic Guideline Reversing Camera (License Light Integrated) is the way to go. It integrates with your car's license light, so you don't have to worry about drilling any extra holes or making any major modifications.
And for Toyota owners with a 10.25" screen, our Toyota OEM Protocol Dynamic Guideline Camera (10.25" Screen Edition) is a great option. It uses the OEM protocol, which means it works seamlessly with your car's existing system and provides accurate and reliable guidance.
Once you've found the right camera for your vehicle, the next step is to gather all the necessary tools and equipment. You'll typically need a drill, screwdriver, wire strippers, electrical tape, and a voltage tester. It's also a good idea to have a wiring diagram on hand, so you know exactly where to connect each wire.
The installation process itself can vary depending on the make and model of your vehicle, as well as the type of camera you're installing. However, there are some general steps that you'll need to follow. First, you'll need to mount the camera in the desired location. This is usually at the rear of the vehicle, either on the license plate or bumper. Make sure the camera is level and facing straight back, so you get a clear view of what's behind you.
Next, you'll need to run the wiring from the camera to the display unit. This can be a bit tricky, especially if you're not familiar with automotive wiring. You'll need to make sure the wires are properly insulated and secured, so they don't get damaged or cause any electrical problems. It's also important to connect the wires to the correct terminals on the display unit, so the camera works properly.
Once the wiring is done, you'll need to test the camera to make sure it's working. Turn on your vehicle and put it in reverse. The camera should automatically turn on and display a clear image on the screen. If you see any problems, such as a blurry image or no image at all, you'll need to go back and check the wiring or the camera installation.
In addition to the basic installation requirements, there are a few other things you should keep in mind. For example, you'll need to make sure the camera is protected from the elements, so it doesn't get damaged by water or dirt. You can do this by using a waterproof housing or by installing the camera in a protected location.
You'll also need to make sure the camera is properly calibrated. This is important to ensure that the dynamic guide line on the screen accurately reflects the path of your vehicle. Most cameras come with a calibration tool or instructions on how to calibrate the camera, so make sure you follow these carefully.
Finally, it's a good idea to have the camera installed by a professional if you're not comfortable doing it yourself. A professional installer will have the experience and tools necessary to ensure a proper installation and can also provide you with a warranty on the installation.
Well, that's about it for the installation requirements of a dynamic trajectory reverse camera. I hope this blog has been helpful and has given you a better understanding of what it takes to get one of these cameras installed in your vehicle. If you have any questions or need more information, feel free to reach out to us. We're always happy to help.
And if you're interested in purchasing a dynamic trajectory reverse camera, we've got a wide range of options to choose from. Just head over to our website and browse our selection. We offer high-quality cameras at competitive prices, and we're confident you'll find the perfect one for your vehicle.
So, what are you waiting for? Upgrade your vehicle with a dynamic trajectory reverse camera today and make parking and maneuvering a breeze!

References:
- General knowledge about automotive electronics and camera installation.
- Product specifications and installation guides of dynamic trajectory reverse cameras.


