


When it comes to installing a Volvo reversing camera decoding module, one of the most common questions we receive as a supplier is, "Do I need any special tools to install the Volvo reversing camera decoding module?" In this blog post, I'll delve into this topic, providing you with a comprehensive guide to help you understand the installation process and the tools required.
Understanding the Volvo Reversing Camera Decoding Module
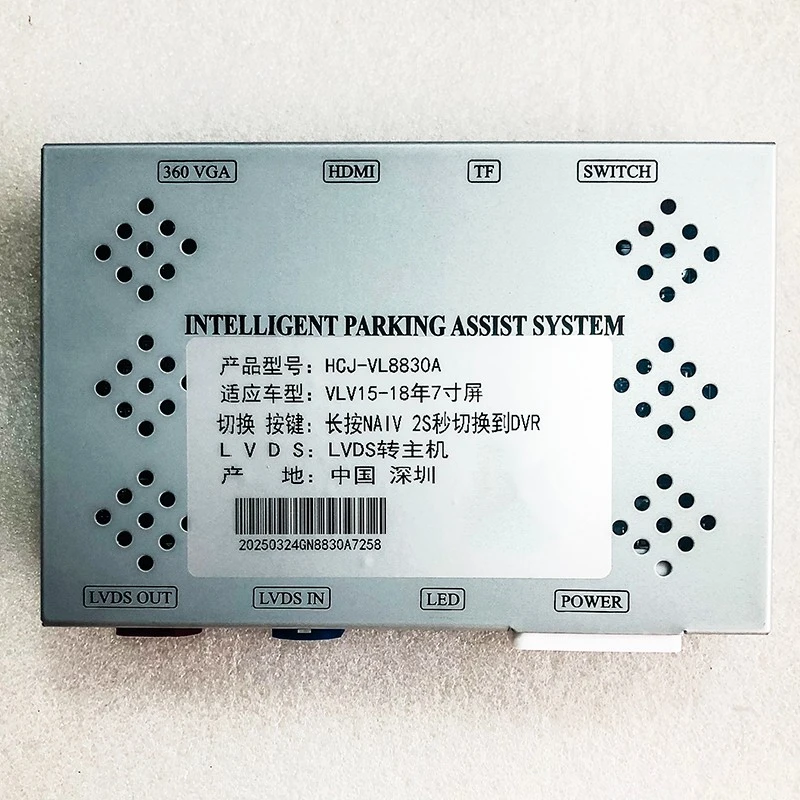
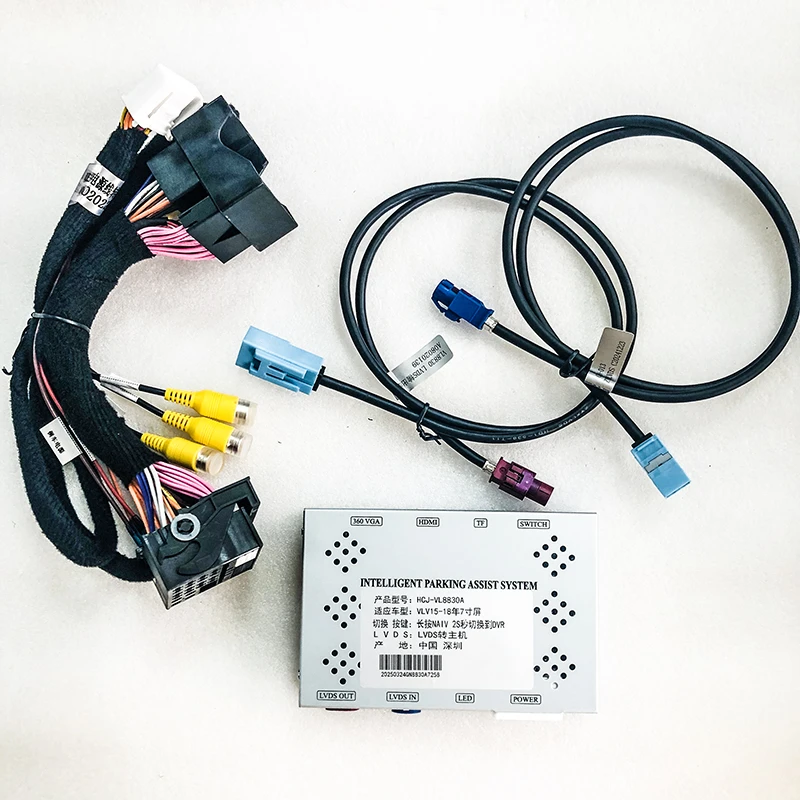
Before we discuss the installation tools, let's briefly understand what a Volvo reversing camera decoding module is. Our company offers two main types of these modules: the Volvo Vertical Screen Full-Range Reverse Camera Decoder Module (2017 - 2022 Model Compatibility) and the Volvo Full-Range 7-Inch Reverse Camera Decoder Module (2015 - 2017 Model Compatibility). These modules are essential for integrating a reversing camera into your Volvo vehicle, allowing the camera's signals to be properly decoded and displayed on your car's screen.
General Installation Process
The installation of a Volvo reversing camera decoding module typically involves several steps:
- Locate the Suitable Installation Position: First, you need to find a proper location in your vehicle to install the decoding module. This is usually near the car's entertainment system or the area where the camera's wiring can be easily connected.
- Connect the Wiring: The module needs to be connected to the vehicle's power supply, the reversing camera, and the display screen. This requires careful handling of the wires to ensure a stable connection.
- Test the System: After the installation is complete, you need to test the system to make sure the reversing camera works properly and the image is displayed correctly on the screen.
Tools Required for Installation
Now, let's answer the main question: Do you need special tools for the installation? In most cases, you don't need highly specialized tools, but you will need a few basic ones:
1. Screwdrivers
A set of screwdrivers is essential. You may need both flat - head and Phillips - head screwdrivers. These are used to remove the panels in your vehicle to access the areas where the decoding module will be installed. For example, to reach the back of the car's display screen or the area near the power supply, you might need to unscrew some panels.
2. Wire Strippers
Wire strippers are used to remove the insulation from the wires so that you can make proper connections. When connecting the decoding module to the power supply, camera, and display, you need to strip the wires to expose the conductive parts for a secure electrical connection.
3. Electrical Tape
Electrical tape is used to insulate the wire connections after you have made them. This helps prevent short - circuits and ensures the safety and stability of the electrical system.
4. Multimeter
A multimeter is a very useful tool. It can be used to test the voltage of the power supply, check the continuity of the wires, and ensure that the electrical connections are correct. This is especially important when you are connecting the decoding module to the vehicle's electrical system.
5. Pliers
Pliers can be used to bend or hold wires in place. For example, when you are making a connection, you can use pliers to grip the wire firmly and make a better contact.
Special Situations and Tools
In some special situations, you may need additional tools:
1. Vehicle - Specific Tools
Some Volvo models may have unique panel designs or wiring systems. In these cases, you might need vehicle - specific tools to remove certain parts or access hard - to - reach areas. For example, some models may require a special tool to remove the dashboard panels without causing damage.
2. Diagnostic Tools
If you encounter problems during the installation or testing process, diagnostic tools can be very helpful. These tools can help you identify faults in the decoding module, the camera, or the wiring. However, these are more advanced tools and are usually only needed if you are an experienced installer or a professional mechanic.
Tips for Installation
Here are some tips to make the installation process easier:
- Read the Manual: Before starting the installation, carefully read the installation manual that comes with the decoding module. The manual will provide detailed instructions and diagrams to guide you through the process.
- Take Your Time: Don't rush the installation. Make sure each step is done correctly, especially when connecting the wires. A hasty installation can lead to loose connections or other problems.
- Label the Wires: When you are disconnecting wires during the installation, label them clearly. This will make it easier to reconnect them correctly later.
Conclusion
In conclusion, while you don't need a large number of special tools to install a Volvo reversing camera decoding module, you do need a set of basic tools such as screwdrivers, wire strippers, electrical tape, a multimeter, and pliers. In some special situations, you may need vehicle - specific or diagnostic tools.
If you are interested in purchasing our Volvo reversing camera decoding modules or have any questions about the installation process, please feel free to contact us for further discussion. We are always ready to provide you with professional advice and high - quality products.
References
- Manufacturer's installation manuals for Volvo reversing camera decoding modules.
- Automotive repair and installation guides.


